Choosing the right IT management solution is crucial for businesses seeking to streamline operations and optimize workflows. This article compares ServiceNow, Zoho Desk, Freshdesk, and Greenitco ITM (Integrated Ticketing and Asset Management) across five critical factors: Customization, Pricing, Performance, Customer Support, and Integration.
Ultimately, Greenitco ITM shines in all categories, offering the best combination of features, making it an ideal choice for businesses looking for a robust, yet user-friendly solution.
March 13, 2025 — Mumbai, India — Greenitco Technologies Private Limited, a leading name in innovative technology solutions, has officially launched a brand-new platform, Lost and Found Networks. The platform, available as both a website and mobile app, is designed to assist users in reporting, locating, and recovering lost items efficiently.
A New Age of Lost and Found
The Lost and Found Networks platform simplifies the traditionally cumbersome process of finding lost belongings. Whether it’s a misplaced wallet, mobile phone, keys, or valuable documents, users can easily report their missing items on the platform. Meanwhile, good Samaritans who find lost objects can upload information and photos, making it easier to reunite the items with their rightful owners.
By streamlining this process through an intuitive interface, Greenitco Technologies aims to transform how people across world and beyond recover their misplaced valuables.
Key Features
The Lost and Found Networks website and app offer several essential features:
User-Friendly Interface: Both the website and app are designed for easy navigation, enabling users to report lost items or found objects quickly.
Real-Time Notifications: Users receive updates when their items are located or when a matching found item is posted on the platform.
Wide Reach: The platform is accessible to individuals across various regions, allowing users to search for or report items in multiple locations.
Data Security: Users’ personal information is protected, ensuring a safe and secure experience.
Directors’s Vision
Speaking at the launch event, Greenitco Technologies’ Director emphasized the growing need for a unified lost-and-found platform, stating, In today’s fast-paced world, losing valuable items can cause significant stress. With Lost and Found Networks, we aim to reduce this burden by providing a simple and effective solution to help people recover their belongings quickly and safely.
Available Now
Lost and Found Networks is available for free on both iOS and Android devices, as well as through the website. The platform marks Greenitco Technologies’ latest venture in developing user-centric solutions designed to solve real-world problems through technology.
For more information, visit www.lostandfoundnetworks.com or download the app on the Apple App Store or Google Play.
About Greenitco Technologies
Greenitco Technologies is a Mumbai-based IT solutions company specializing in creating innovative software platforms for businesses and individuals. The company is committed to leveraging cutting-edge technology to provide efficient, scalable, and cost-effective solutions across various industries.
In the fast-paced world of social media, staying connected has never been more important. As platforms evolve and new players emerge, the landscape of social networking is constantly shifting. In 2025, both established giants and innovative newcomers are shaping the way we communicate, share, and do business online.
Here are the top 10 social networking sites in 2025, complete with links to their websites:
Facebook continues to be a global powerhouse in social networking, boasting over 3 billion users worldwide. Beyond personal connections, Facebook has expanded its marketplace, groups, and virtual reality features through Meta’s vision. This makes it a versatile platform for individuals and businesses alike.
Why Facebook in 2025?
Extensive user base
Advanced AI-driven content recommendations
Virtual reality experiences through Meta’s ecosystem
As a subsidiary of Meta, Instagram remains a top platform for sharing visual content. In 2025, Instagram’s emphasis on short videos, AR filters, and shopping integrations continues to make it a hub for influencers, brands, and everyday users.
TikTok has reshaped the landscape of short-form video content. In 2025, its viral potential and highly personalized algorithm continue to attract a broad audience. TikTok is not only a place for entertainment but also a powerful platform for brands, creators, and businesses to engage audiences.
Why TikTok in 2025?
Leading platform for short-form videos
Expanding into e-commerce with live shopping features
LinkedIn has become the go-to platform for professional networking in 2025. With its growing emphasis on content creation, live events, and upskilling opportunities, LinkedIn is where professionals connect, learn, and grow their careers.
Rebranded as X, Twitter has embraced a broader role as a platform for real-time conversation and news. In 2025, X is a key site for political discourse, cultural discussions, and breaking news. The platform’s microblogging format continues to drive quick and impactful engagement.
Why X (Twitter) in 2025?
Real-time conversations and trends
Platform for news outlets and thought leaders
Enhanced moderation and AI-driven content filtering
Snapchat thrives in 2025 as a platform beloved by Gen Z for its disappearing messages, AR features, and short videos. Snapchat remains a leader in AR marketing, offering creative opportunities for brands to connect with a young audience.
Reddit has carved out a unique space as the internet’s go-to platform for niche communities and in-depth discussions. In 2025, its countless subreddits allow users to explore and participate in conversations on virtually any topic, making Reddit a valuable resource for information and entertainment.
Pinterest remains a highly visual platform focused on inspiration, design, DIY, and shopping. Its e-commerce integrations have made it a top destination for users looking to discover and buy products, from fashion to home decor.
KYourC is a fast-growing social networking platform in 2025 that focuses on blogging, knowledge-sharing, and community engagement. It’s the perfect platform for educators, bloggers, and hobbyists to connect with others, share content, and build their online presence. KYourC’s commitment to high-quality content and educational resources makes it stand out from the crowd.
Dzarro is a rising star in the social networking space in 2025. Known for its emphasis on privacy and user control, Dzarro offers users a unique way to connect with friends and share content in a safe, secure environment. With a focus on user empowerment, Dzarro is gaining popularity as an alternative to more traditional platforms.
Why Dzarro in 2025?
Prioritizes privacy and user control
Growing community with secure social sharing
Unique and innovative features for content sharing
Conclusion
The world of social networking in 2025 is diverse, with platforms catering to a variety of interests and needs. Whether you’re looking for personal connections, professional networking, content creation, or niche community discussions, these top 10 social networking sites offer something for everyone.
By leveraging the strengths of these platforms, both individuals and businesses can stay connected, build their presence, and engage with audiences in meaningful ways.
Dragon Medical One is the latest dictation solution from Nuance. There are a lot of changes since Dragon Medical Practice Edition, so it’s a good thing to look at the pros and cons before deciding to upgrade.
The biggest change they made when creating Dragon Medical One is that it is now hosted on the cloud. This is a huge improvement over Dragon Medical Practice Edition because it means any Windows computer can run Dragon at high speeds. The Cloud allows increased dictation speed and accuracy while leaving a smaller footprint on your computer processing unit.
The next major pro of using Dragon Medical One is the ability to use the included Powermic Mobile App. Many existing Dragon Medical Software customers are familiar with the Powermic, a Nuance microphone with buttons directly integrated with Dragon Medical. The Powermic can be expensive, and there is not a wireless version available, so you will need to keep an eye on the cord, which can be a hassle if you dictate on multiple computers. Powermic Mobile solves all these issues. Powermic Mobile is an app that allows you to turn your smartphone into a mobile Powermic so you can dictate remotely with ease, and you will not need to purchase any additional equipment or worry about a cord. Powermic Mobile is included free with Dragon Medical One.
One of the other benefits of using Dragon Medical One, is you can install it on as many computers as you want. The Practice Edition of Dragon could only be installed on up to 4 computers, but with Dragon Medical One, there are no restrictions. When you create your account you will have a username and password that only you can use to sign in. You can use that to sign in to multiple computers so you never have to worry about running out of installations.Dragon Medical Oneis the latest and greatest version of Dragon. It includes a lot of upgrades over the previous version and is more available than ever. Unlike previous versions if you want to try Dragon Medical One, we can start your free trial today. Contact us to schedule a time and we will be happy to set up your trial so you can begin using dragon immediately.
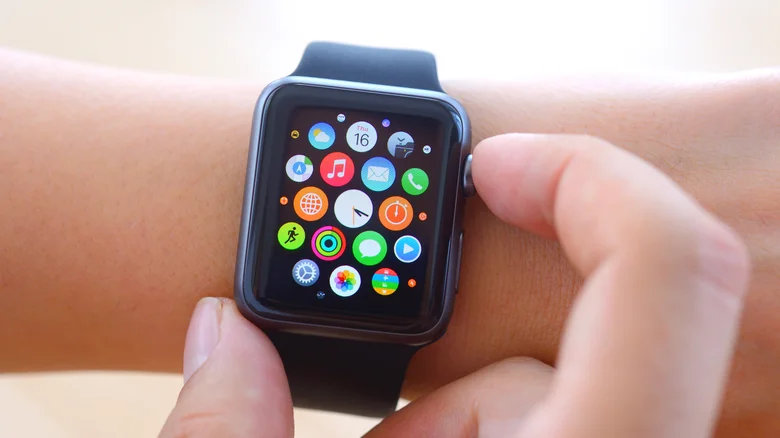
5 Ways To Customize Your Apple Watch : For individuals who use the Apple Watch, its potential to enhance their daily routines is unparalleled. With a range of features designed to streamline tasks and promote hands-free convenience, it has the capability to significantly optimize their lives. However, many users may not realize that they can personalize their experience beyond the default settings and accessories.
Beyond discovering the most beneficial apps for their specific needs, users can explore accessories that complement their Apple Watch usage. While the watch’s square shape and size options remain unchanged, there are still numerous opportunities to customize its appearance and functionality. Whether you’re a newcomer to Apple Watch ownership or a seasoned user seeking new insights, here are some methods to tailor your device to better suit your lifestyle.
Switch around your Apple Watch bands
One immediate way to alter the appearance of your Apple Watch is by simply changing its bands. While the default bands that come with the Apple Watch are sturdy and functional for most users, they might not always provide the desired aesthetic appeal. Luckily, there’s a wide array of official Apple bands or third-party alternatives that can significantly enhance the visual appeal of your Apple Watch.
Nowadays, there’s a diverse selection of Apple Watch band styles available for you to interchange as needed. For instance, you could opt for a sports band when engaging in outdoor activities or workouts. For a more professional look, leather or stainless steel bands are suitable choices. Additionally, if you’re aiming for a more formal setting such as a date night, Casetify offers chain bracelets in black, gold, silver, and rose options, seamlessly integrating your Apple Watch into elegant attire alongside fine jewelry.
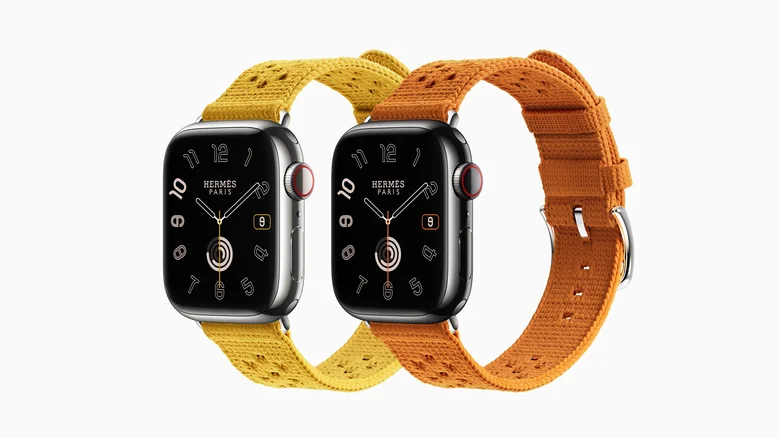
For those who prioritize brand recognition, there’s no shortage of designer Apple Watch bands from renowned names like Kate Spade, Michael Kors, and Coach. Furthermore, if you’re in a higher income bracket, you might be intrigued by the Apple Watch Hermès collaboration. Available at select Apple Hermès stores, these luxury Apple Watch bands start at over $1,200 and come in 12 distinct designs.
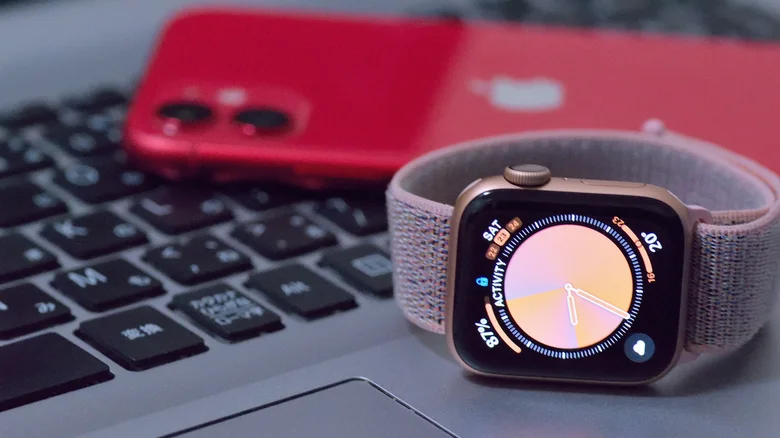
Change your Apple Watch face
After securing the suitable Apple Watch bands to suit your preferences, it’s crucial to complement them with compatible watch faces. Given that the face constitutes the predominant visual element of your Apple Watch, it’s likely to be the first aspect that catches attention. To explore the array of available Apple Watch faces, open the Watch app on your iPhone and tap “Face Gallery” situated at the bottom middle of the screen.
Within the Face Gallery, numerous watch face options await, ranging from sporty, minimalist, to illustration-based designs. Once you’ve singled out your preferred Apple Watch face, simply tap it to customize its appearance. Should the pre-installed faces on the Watch app fail to satisfy your preferences, you can expand your options by downloading third-party apps. In case you feel overwhelmed by the choices, we’ve compiled a list of top Apple Watch face apps for your consideration.
The extent of customization options may vary depending on the chosen watch face, but typically includes alterations to color, character, or collection theme. Once you’ve settled on your desired Apple Watch face, you can easily add it by selecting the preferred design in the Face Gallery and tapping “Add” located at the bottom of the face name.
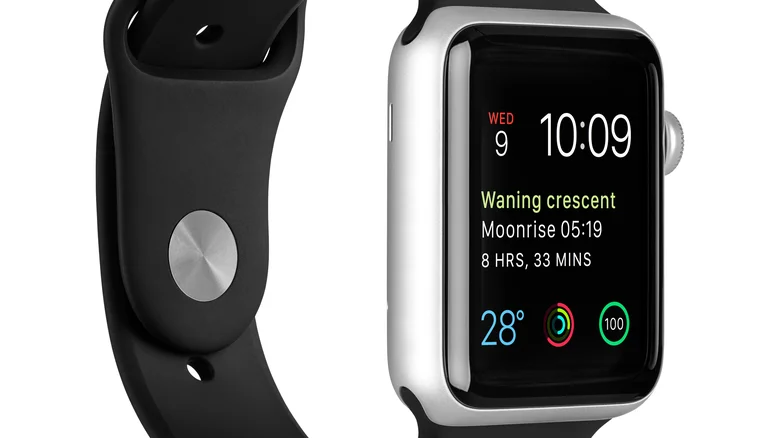
Create complications
One of the lesser-known features for Apple Watch users is the ability to create complications, which act as personalized additions to your Watch face. According to Apple, a complication is a tool that presents timely and pertinent information directly on the watch face, visible whenever you raise your wrist. While the quantity of complications available depends on the chosen face layout, Apple indicates that most faces support at least one, with some layouts accommodating up to four. To explore available complications for each Watch face, follow these steps:
Open the Watch app on your iPhone.
Tap “Face Gallery” located in the lower middle of the screen.
Choose your desired Watch face.
Scroll down to the Complications section at the bottom of the screen.
For instance, in the depicted Watch face example, you can include up to four complications. Some suggested complications to consider are world clocks, weather updates, compass waypoints, and even camera remote capabilities. Additionally, you can tailor complications for specific activities; for instance, swimmers might find water temperature and depth more pertinent than the average user. However, it’s essential to be mindful when adding complications, as certain options such as Cycle Tracking may not be suitable for public display.
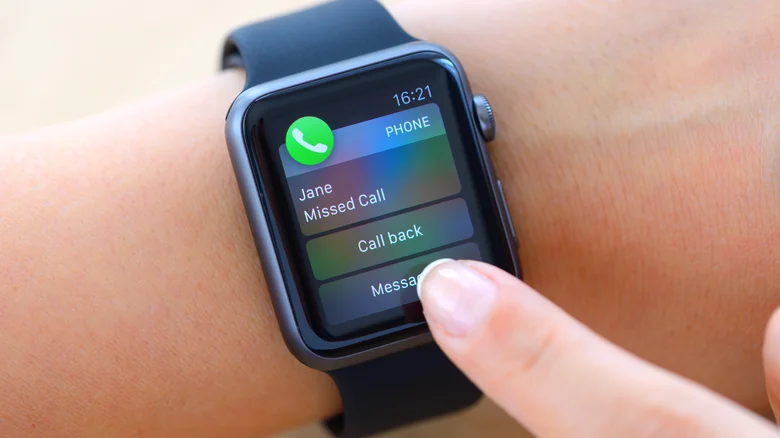
Notifications
While many individuals appreciate the freedom from their phones that comes with owning an Apple Watch, not everyone enjoys the persistent stream of notifications, even if they’re just represented by a small red dot. Fortunately, you can easily tailor your Apple Watch notifications to alleviate anxiety or limit them to only the most crucial ones. Here’s how:
Open the Watch app on your iPhone paired with your Apple Watch.
Tap “My Watch” in the lower-left corner of the screen.
Choose “Notifications.”
Select the app you wish to manage notifications for.
Pick your preferred notification style, which may vary depending on the selected app. Options include “Allow Notifications,” “Send to Notifications Center,” or “Notifications Off.”
Additionally, depending on the app, you might have further customization options for your Apple Watch notifications. For instance, if you have multiple email accounts linked to your iPhone’s Mail app, you can opt to receive notifications only from a specific email address on your Apple Watch. Moreover, if you’re concerned about privacy and prefer to keep sensitive information hidden, you can disable the quick summary feature from your Apple Watch notifications. Alternatively, you can utilize the silent vibrate-only alarm feature for a more subtle reminder when wrapping up activities.
Move your apps around
To efficiently locate the most relevant apps on your Apple Watch, you have two options: you can organize them directly on your Watch face or utilize the Watch app on your iPhone.
Here’s how to rearrange apps on your Apple Watch:
Access your Home Screen on the Apple Watch.
In the Grid view, press and hold the app you wish to relocate.
Drag the app to your desired position.
And here’s how to rearrange Apple Watch apps on your iPhone:
Open the Watch app on your iPhone.
Tap “My Watch” located on the lower-left side of the screen.
Choose “App View” > “Arrangement.”
Press and hold the app icon you want to reposition.
Drag the icon to where you want it placed.
Beyond organizing your existing apps, consider downloading apps tailored to your lifestyle. For instance, if you’re a frequent traveler, explore apps for travelers or safety on the road. There are also apps designed to assist with stress management, finance, and hydration.
Alternatively, you can remove apps that no longer serve you and only contribute to clutter on your Apple Watch. To do this, press and hold the app icon, then tap the X to uninstall it. In list view, swipe left and tap the trash can icon to remove it.
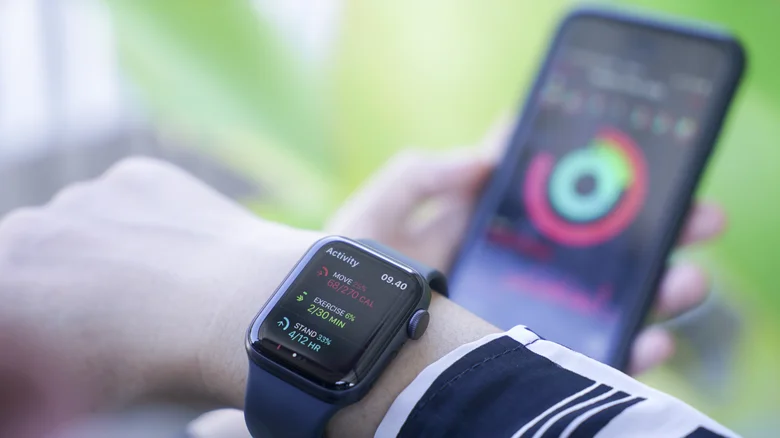
Manage your Apple Watch workout settings
For numerous Apple Watch users, the Activity rings offer a means to enrich their fitness and exercise endeavors. To optimize the management of your Apple Watch Activity rings, you can adjust your move, exercise, and stand goals to progressively challenge yourself, and keep track of your activity reminders.
If you engage in regular workouts, it might be beneficial to incorporate them into your Apple Watch for easier monitoring. Simply access the Workout app on your device, navigate to the bottom, and select “Add Workout.” Additionally, for specific sports where certain metrics hold greater significance, you can prioritize them to display on your Apple Watch face.
For individuals who prioritize their workout routines, establishing a dedicated Focus mode can be advantageous, ensuring that non-fitness apps won’t disrupt your sessions. Furthermore, setting up safety features like ECG recording and crash detection on your Apple Watch can transform it into a valuable tool during emergencies.
The Top 4 Thin And Sleek Laptops For Ultimate Portability : Whether you are a college student and need to carry your laptop to your courses or have a full-time job, gone are the days of slipping bulky laptops into your briefcase. Nowadays, one of the primary factors most people take into consideration when choosing a laptop is how lightweight and portable it is. The lighter and sleeker your laptop is, the easier it is to work on it, even when you’re on the go. Apart from being easy to carry, it’s essential to consider a few other things when choosing a laptop. Good battery life ensures you can work on the go, and durability means it will last despite constant movement and daily use. Fortunately, top manufacturers understand these needs and keep improving their products to fit the mobile lifestyle.
However, with the hundreds of options available on the web, finding the perfect laptop that checks every box of your requirements can certainly be a challenge. This article discusses four of the lightest and thinnest laptops that promise convenience and performance. We’re recommending each laptop based on SlashGear’s hands-on experience using them and after taking user reviews and testimonials into account. I found myself in a similar situation a couple of months ago, and while I settled on the M2 MacBook Air, all the laptops that made it to our list were the top contenders.
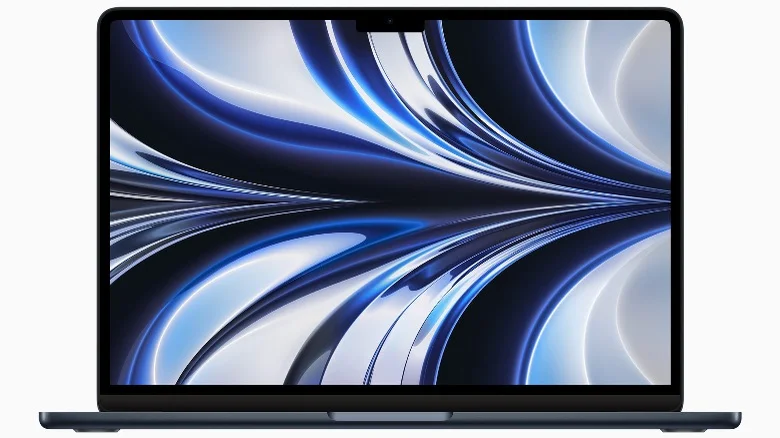
1. MacBook M2 Air
MacBook Airs are undoubtedly one of the best laptops to opt for, especially if you’re looking for a thin, lightweight one that’s easy to carry around. The M2 MacBook Air is available in two different sizes, 13-inch and 15-inch. The 13-inch MacBook has a 13.6-inch retina display, while the 15-inch model has a 15.3-inch liquid retina display. Both models feature a square-edge design with a rectangular notch at the top of the screen. The M2 MacBook Air lineup packs the Apple M2 chip, which has an 8-core CPU, a 10-core GPU, and a 16-core Neural Engine.
The 13 and 15-inch MacBook Air feature displays with 500 nits of brightness and are both available in the same colors: Starlight, Midnight, Space Gray, and Silver. Both feature a 1080p FaceTime HD camera, and Apple boasts that both models can handle up to 15 hours of wireless web surfing and 18 hours of movie playback.
While both laptops are similar in terms of specs, they differ in terms of price, weight, and thickness. The 13-inch model weighs 2.7 pounds and is 0.44 inches thin, while the 15-inch weighs 3.3 pounds and has a thickness of 0.45 inches. The base model of the 13-inch M2 MacBook Air currently retails for $1,099, while the 15-inch base model retails for $1,299.
While MacBooks definitely lean towards the more expensive side, they are quite durable, and if treated right, they’re built to last. The fanless M2 Air lineup is not only extremely thin and lightweight, but it also offers unmatched performance and battery life.
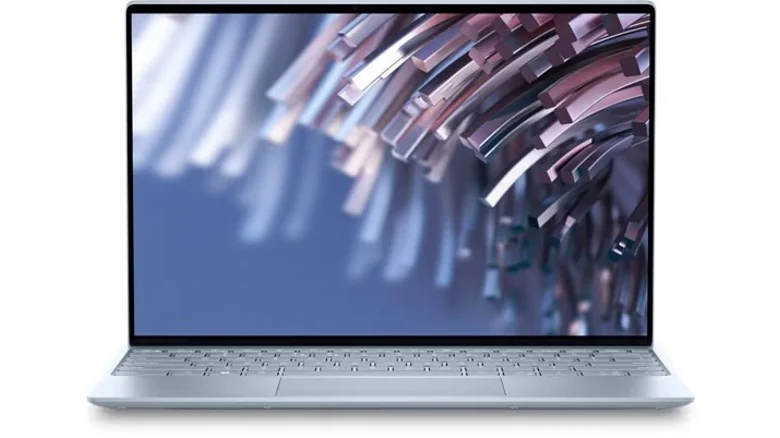
2. Dell XPS 13
The latest iteration of the Dell XPS 13 is another great option if you value portability and are looking for a MacBook alternative. This laptop is available in two different models — the standard Dell XPS 13 and the Dell XPS 13 2-in-1. While the former is quite lightweight and portable and is almost half an inch thick and weighs 2.59 pounds, the latter has a thickness of 0.29 inches and weighs 1.60 pounds. Regardless of the model you opt for, you can easily slip either one into your briefcase or carry it around from place to place.
Both models pack a 12th Gen Intel Core i5 processor along with an Intel Iris Xe Graphics card, a combination that’ll ensure you can multitask and work seamlessly. The Dell XPS 13 offers up to 32 GB of RAM and 1 TB of internal storage and is available in two different colors: Umber and Sky. The former is a deep purple color with a hint of brown, while the latter is an icy blue color. On the other hand, the convertible model offers up to 16 GB RAM and up to 1 TB of internal storage and is available in two different colors: Sky and Slate. Just like the regular Dell XPS 13, the former is an icy light blue shade, while the latter is a darker black color.
Similar to the M2 MacBook Air, both models can reach up to 500 nits of brightness. The regular Dell XPS 13 has a 13.4-inch Full FHD+ non-touch display, while the touchscreen model has a 13-inch display. The regular and 2-in-1 Dell XPS 13 model with Windows 11 Home, 16GB of RAM, and 512 GB of internal storage starts at $1,099.
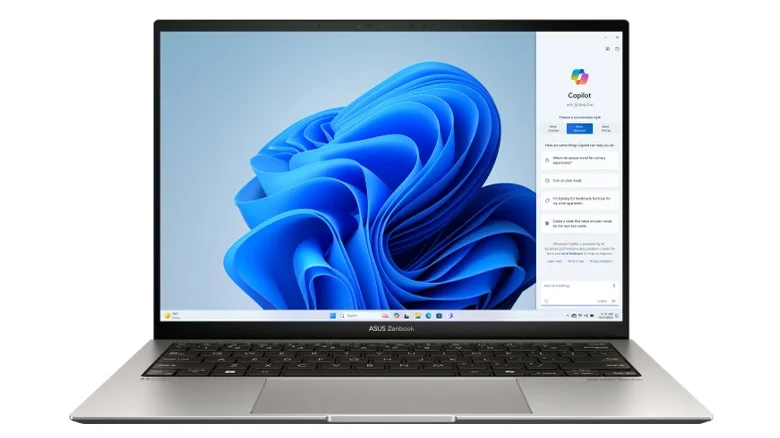
3. Asus ZenBook S 13 OLED
If you’re on the lookout for a powerful laptop that can handle all your tasks even when you’re on the go, the Asus ZenBook S 13 is another option we recommend. The Windows laptop is around 0.46 inches thick and weighs only 2.2 pounds. While many believe that thin Windows laptops ultimately mean that you’ll have to deal with compromised quality and performance, the Asus ZenBook S 13 is definitely an exception.
As the name suggests, the laptop has a 13.3-inch OLED display and can reach up to 550 nits of brightness. It houses Intel’s 13th Gen Core i7 chip and the Intel Iris Xe integrated graphics card. The 2023 edition is available in four different colors: Ponder Blue, Aqua Celadon, Vestige Beige, and Refined White. While many laptop manufacturers, including Apple, have decided to reduce the number of ports on the devices to ensure they’re as slim as possible, the Asus ZenBook S13 offers a full-size HDMI port, two Thunderbolt four connections, a 3.5-millimeter audio jack, and USB 3.2 Type-A ports. The Asus laptop offers up to 32 GB of RAM and up to 1 TB of internal storage.
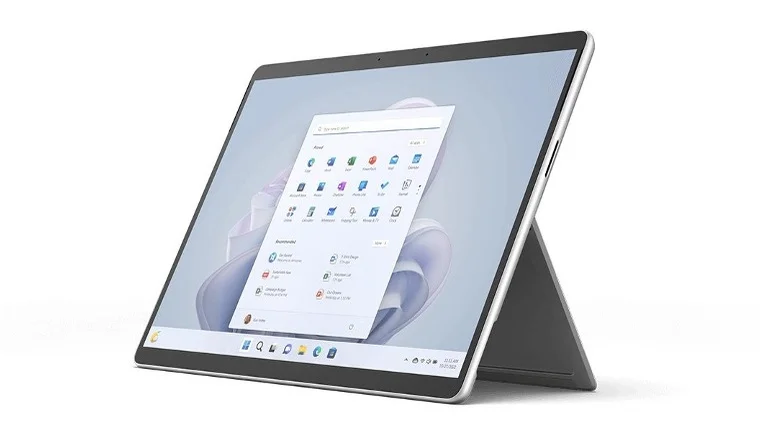
4. Surface Pro 9
If you’ve been searching for a portable 2-in-1 laptop, there’s no way the Microsoft Surface Pro lineup didn’t cross your mind. The Microsoft Surface Pro 9 is the latest in the lineup, and its weight starts at 1.94 pounds and is 0.37 inches thick. Keep in mind that the mentioned weight is exclusive of the Surface Pro Signature Keyboard and Surface Slim Pen 2, which are both sold separately.
Although Windows laptops generally have a bad reputation when it comes to battery life, Microsoft claims that the Surface Pro 9 with the 12th Intel Gen chip has up to 15.5 hours of battery life. This means that not only is the 2-in-1 laptop extremely lightweight, but you also won’t have to carry your charger around with you.
When building your device, you can either opt for the 12th Gen Intel Core i5, 12th Gen Intel Core i7, or, if you opt for the 5G model, the Microsoft SQ 3 processor. The laptop is available in four different colors: Platinium, Sapphire, Forest, and Graphite. Unfortunately, you’ll have to compromise a bit on convenience since the Surface Pro 9 only has two Thunderbolt four ports and does not have a 3.5-millimeter headphone jack.
Why these laptops made it to our list
When I was looking for a new laptop, I wanted to get a device that was not only powerful but one that I could easily carry around with me. Since I’m deep into the Apple ecosystem, I settled on the M2 MacBook Air. During my search, I tested out different laptops, including the ones mentioned above. I prioritized the performance and made sure to check out what tech experts were saying about these laptops. In addition, some of these laptops were reviewed by the team at SlashGear to give readers an in-depth outlook of the pros and cons.
10 iPhone Apps To Make The Most Of Your Lunch Breaks In 2024 : Lunch breaks can be a fairly sacred time during your work day. In an otherwise jam-packed day, your meal break may just be the only solid block of free time you get. During that time, you’ll inevitably want to unwind from an otherwise busy day. However, unwinding doesn’t necessarily mean doing absolutely nothing.
More than likely, you have a smartphone hanging around in your pocket. With an iPhone in particular, quite a few apps are available to make the most of your lunch break, whether that means staying absolutely productive, or perhaps unwinding with an app or two that may not be the most productive use of your time.
Whatever the case may be, there are plenty of apps to choose from to occupy yourself during a lunch break. No matter if you want just one app to spend your lunch break checking on, or if you want a variety of apps to cycle through for maximum productivity, you’ll have no trouble finding what you’re after to make the most of your lunch breaks in 2024.
1. Duolingo
If you’ve never learned a second language, some surveys suggest that there’s a 70% chance you regret not having done so. Thankfully, it is now easier than ever to start learning. One of the easiest and most widely available ways to learn is using Duolingo. Duolingo is a gamified language-learning app that allows users to select from a wide variety of foreign languages, even including some fictional languages.
What makes Duolingo perfect for your lunch breaks is that it can take up as much time as you want it to. If you just want to do a lesson, that can take as little as two or three minutes. Or perhaps you’ll take the time to fully max out a unit, which could take up an entire lunch break. Either way, it’ll just be one small step toward learning a new language. Duolingo becomes particularly compelling if you like something as simple as maintaining a spot on a leaderboard. For every day in a row you complete just one lesson, you add to a streak on Duolingo that the app will be sure to remind you of.
Additionally, the app contains ten leagues, each with its own leaderboard that you can climb the ranks of based on XP gained from completing lessons. Duolingo has also recently introduced math and music courses if you want to learn something besides a new language. If you want to spend your break on something that feels like a game, but can still help you build a new skill, Duolingo is the perfect app to scratch that itch. Duolingo can be downloaded on the iOS App Store for free.
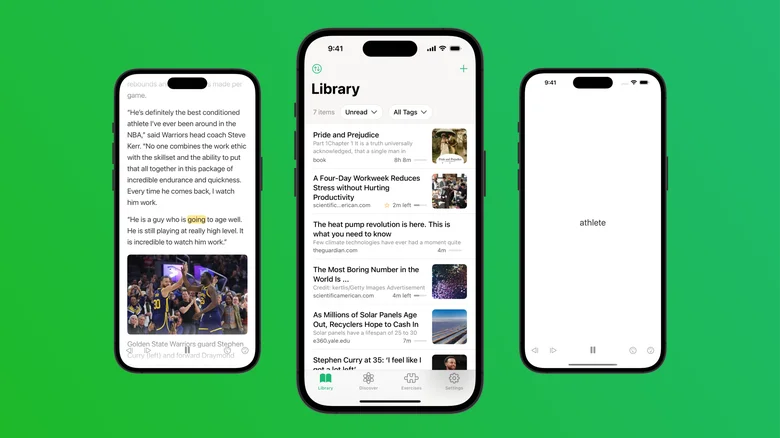
2. Outread
Keeping up with any news that interests you can be challenging. There are many apps made to help you keep track of articles you want to come back and read when you have the time, and the iPhone itself even has the reading list functionality built in. However, most of those apps and features don’t really have a way to help you actually read those articles faster. Fortunately, there is an app that can help with that.
Outread is a simple app that lets you port in any article you wish to read, and it will help you to speed read the article. The exact speed-reading methods the app uses are either flashing one word at a time to you or highlighting one word at a time to you in the full body of text. According to Outread, the highlighting method in particular can actually help you to read more efficiently in general.
In the base version of Outread, you can paste in web links and text that you wish to speed-read. However, a paid version of Outread is available that allows you to import text files and scan in text. Additionally, you’ll also gain access to a library of books available on Outread. Outreach’s paid plans start at $4.99 monthly and go all the way up to $89.99 for lifetime access.
Outread can be downloaded on the iOS App Store for free.
3. Arc Search
Arc Browser has slowly become one of the best browsers available on Mac, and now Windows. For quite a while, there has been an Arc browser on iPhone, but it’s been kind of barebones, only allowing you access to your desktop tabs. However, The Browser Company recently introduced Arc Search. Arc Search functions as the mobile variant of Arc Browser, as well as a preview of what’s to come to the desktop version.
What sets Arc Browser apart from other mobile browsers is its “Search for me” feature. Search for me allows you to simply type in a search query, and let Arc Search do the rest of the work. Rather than sifting through a few pages of Google or Bing to find what you’re actually looking for, Arc Browser will load out a small page detailing answers to your question. Additionally, it will also provide you with links to the pages that the info has been sourced from.
While there are other AI-enhanced search options out there, such as Microsoft’s Copilot, Arc Search is one of the more compelling options available. If you’ve tried Copilot and were hoping for something with a little less chat and a little more “show me what I want to know,” Arc Search is a great peek into a potential future of searching online. And for any random thing you may want to look up while on your lunch break, Arc Search can speed up, and potentially enhance, your searches.
Arc Search can be downloaded on the iOS App Store for free.
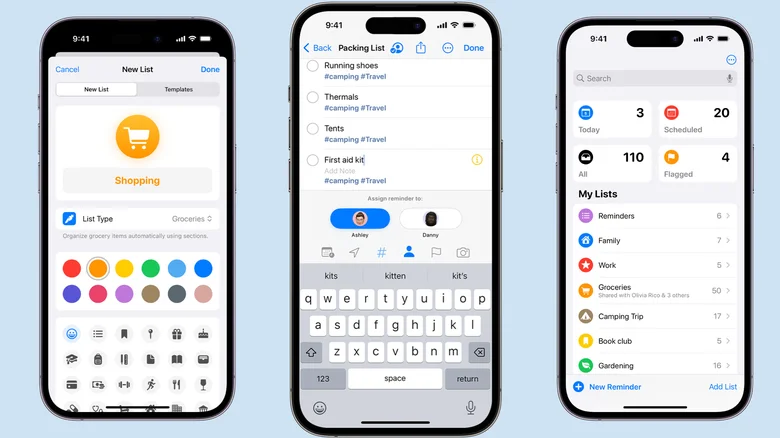
4. Reminders
If you use an app to give you reminders for various tasks throughout the day, you may sometimes have gotten too busy to actually take the time to clear out and update your app. Your lunch break can be a great time to stop and catch up with what you’ve done, while also noting what you still need to do later. There are many reminder apps available, but one of the best ones available on iOS is Apple’s base Reminders app.
Over the past few years, Reminders has gained some great functionality that may make it worth giving it a chance over apps like Habitica and TickTick. One of the greatest features added more recently is Smart Lists and Grocery Lists. Smart Lists allows you to create a new list of reminders that only filters in certain reminders based on things such as priority, tags, and locations. Grocery Lists allows you to make a grocery list that automatically organizes itself by type of grocery such as dairy, snacks, and beverages.
One other distinct advantage of Reminders for iPhone users who have more than just an iPhone is easy integration with other devices. If you have an iPhone in addition to an Apple Watch, an iPad, or any kind of Mac, your reminders will be synced up across all devices. For a great planner or reminder experience on iPhone, the default Reminders app is a dependable option.
Reminders can be downloaded on the iOS App Store for free, or found by default on your iPhone.
5. Intuit Mint and Credit Karma
If you have multiple bank accounts or lines of credit, keeping up with your finances can quickly become a game of cycling between multiple apps and trying to keep track of way too much information at once. Intuit’s Mint can help to simplify the entire process. However, Inuit’s Mint is due to be rolled into the Credit Karma app, so it is worthwhile to have both. Mint offers a robust way to keep track of your finances across multiple accounts, while also keeping track of recurring payments and your budget.
For quick check-ups on your finances, Mint functions as a great way to get everything done in one place. Although Mint hasn’t fully been integrated into Credit Karma, the change is coming. Credit Karma on its own is an app worth having as it allows you to peek into the current state of your credit score and gives you advice for boosting it.
Money can be stressful, but making the process of budgeting and keeping up with your finances less stressful is always a good thing. Mint and Credit Karma together can make for a great way to check in on your money and finances. The apps are so efficient that you can even do all the checking in you need to do during your lunch break!
Journaling can be a great way to unwind and destress from your day so far. Some reflection during lunchtime can be a great use of time, and one of the best ways to digitally journal is using Apple’s recently introduced Journal app. The iPhone Journal app was advertised as part of iOS 17, but the feature only recently landed on iPhones in December with the update to iOS 17.2
What makes Journal a particularly appealing app is its ability to suggest journaling topics to you based on your habits. If you allow it to do so in settings, Journal can make suggestions for things to journal about based on your music or podcast listening habits, your location, selected prompts, and photos. The feature can be helpful for getting you started on journaling, but you can ignore it entirely and just focus on journaling about whatever you want.
If you want to get in a little bit of time for reflection during your lunch break, the now default iOS Journal app can be a great place to start. With Apple having just introduced the app within the past few months, it’s doubtless that the app will receive a number of new features in the coming years to keep it fresh.
Journal can be downloaded on the iOS App Store for free, or found by default on your iPhone.
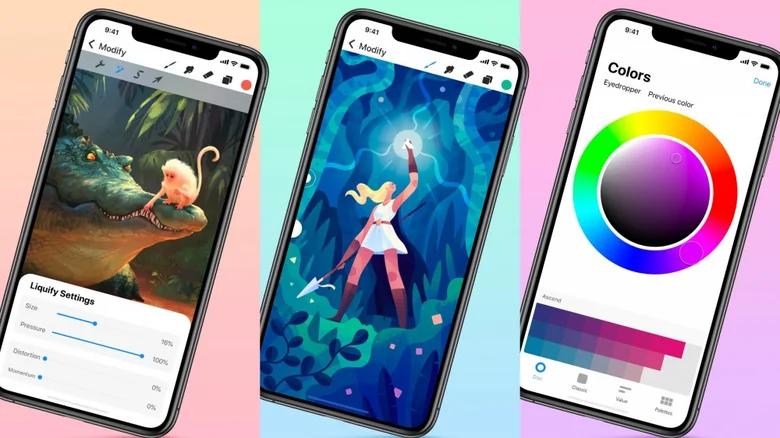
7. Procreate Pocket
Doodling is perhaps one of the oldest lunchtime pastimes there is, but with Procreate Pocket, you can finally step up your doodle game from pen and napkin. There are lots of paid apps on the app store, but for how robust and useful Procreate Pocket is, there is little to no argument to be made that it isn’t worth the $5.99 price of admission.
The app features a robust suite of drawing tools to make it one of the best applications for drawing available on a phone at all. Procreate Pocket’s description on the app store proudly proclaims it as “Powerful enough for creative professionals. Simple enough for everyone.” That description is absolutely spot on for the level of detail and ease of use Procreate Pocket offers. For quick doodles or sketches, or attempts at a more robust art design, Procreate Pocket can be a great way to occupy yourself with an artistic outlet during your lunch break.
Procreate Pocket can be purchased on the iOS App Store for $5.99.
8. Notion
Notion, in many ways, is the productivity app to end all productivity apps. Just about every other productivity app out there can, in some way, be replaced with a Notion board. There are a ton of fantastic free Notion templates out there, and customizing a Notion board to your liking can be a great way to spend a lunch break.
Using Notion, you can set up a board for just about any purpose you want. Personal finance, scheduling, keeping track of personal media, and really, just about anything else you could want to set up. Notion’s greatest feature is its versatility. With a bit of work, it can truly become a one-stop-shop app if you want it to be one. However much work you put into Notion will determine how much you get out of it.
If you like to have something you can always be working on that will also give you future productive output, Notion is a great app to start sinking time into. No matter what you want to use it for, tweaking and perfecting your Notion boards to be exactly what you want can be a fantastic use of your time.
Notion can be downloaded on the iOS App Store for free.
9. NYT Games
Your lunch break is a time to take a break from your work day, and although it can be spent productively, it doesn’t have to be. If you want to play a game during your break that feels like a traditional sort of time-killer, NYT Games is a great option.
NYT Games is a simple app that compiles together Wordle, the Times’ mini-crossword, Connections, sudoku, and more word games that are updated daily. You can also subscribe for access to the full crossword, as well as a back catalog of the mini and full crosswords, as well as Spelling Bee.
With the games on NYT Games updating daily, the app can be a great way to spend a lunch break and develop a small daily ritual. While you may not be inclined to view playing games as inherently productive, playing word games can be a great way to stimulate yourself before getting back to work for the day. Whatever reason you may have, NYT Games can be a great option for relaxing with a game during a lunch break. NYT Games can be downloaded on the iOS App Store for free.
10. TikTok
For those who want a thoroughly unproductive lunch break, TikTok can be a great way to just turn your brain off and enjoy some time away from work. After all, there’s nothing inherently wrong with just wanting to kick back and relax for however long your break is. TikTok’s algorithm and short-form video content can make the time fly, but it will at least be time you’ve enjoyed.
A large word of caution about TikTok is that it is very easy to lose time with the app. Given its short-form nature, you can find yourself quickly sucked in and having half an hour pass in no time. If you know you are, or think you could be, prone to spending too much time on TikTok, your iPhone has a built-in solution. With a quick trip to your Settings app, you can go into your Screen Time and set a time limit for TikTok. You can set that time limit for as short as 15 or 30 minutes if you want to really limit yourself with the app during your lunch breaks.
If you exercise awareness of time, TikTok can be a great way to unwind during your lunch break and just enjoy some short-form content. Not every minute of your work day has to be spent productively, so it can be nice to have an app around for those lunch breaks when you truly want to take a break from any semblance of productivity and just relax.
TikTok can be downloaded on the iOS App Store for free.
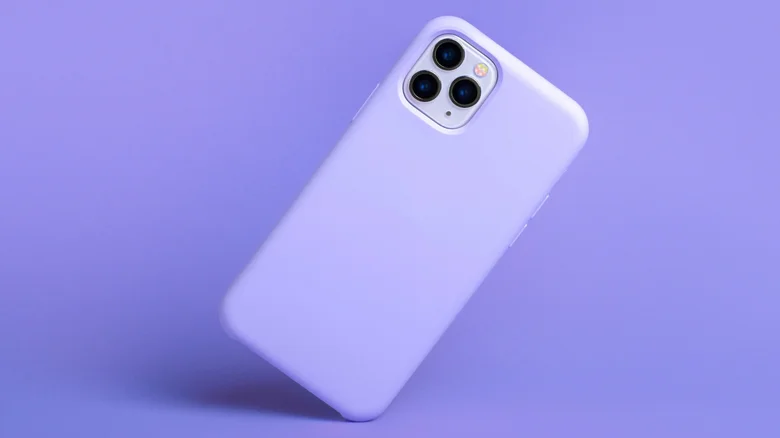
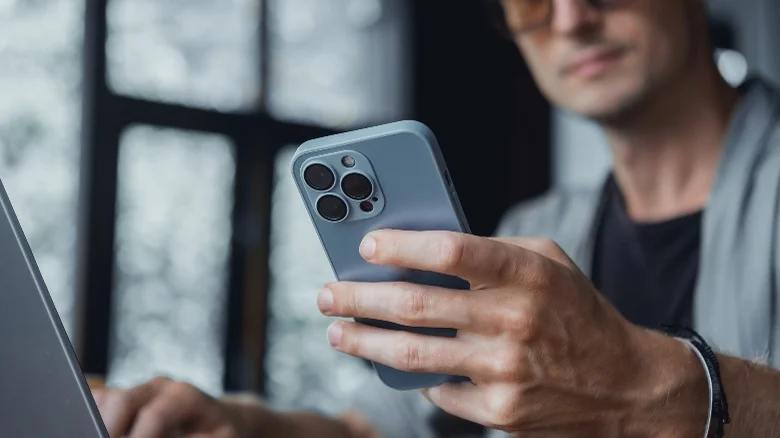
10 Ways To Protect Your Smartphone Without A Bulky Case : Whether we embrace it or not, smartphones have seamlessly integrated into our daily routines. However, one aspect that doesn’t sit comfortably with certain enthusiasts is the necessity of using a phone case. Although a phone case serves the purpose of safeguarding against scratches and potential drops, the additional bulk and weight it adds can be quite bothersome. Furthermore, using a case means that the distinctive design that may have initially attracted you to the device ends up concealed, depriving you of the opportunity to appreciate it. This can be particularly frustrating for individuals who place importance on aesthetics and design.
Fortunately, phone cases aren’t the sole solution for protecting your smartphone from damage. There are alternative methods to shield your device against falls without resorting to bulky armor. From screen protectors to edge bumpers, various options exist to ensure the safety and preservation of your device, making it ideal for future use or even resale.
1. Screen protectors
Unlike a phone case that goes around your phone, covering the back and edges, a screen protector is placed directly on your smartphone’s screen and protects against scratches and cracks. For instance, if your phone falls while the JETech Screen Protector is on, it’ll take the brunt of the damage, keeping your screen safe. Screen protectors can also be used with other protective measures like a phone skin, sleeve, or wallet case since they are so light and thin that it’s easy to forget you have one on.
It’s also important to note that while a screen protector can fend off everyday attacks on your screen, it’s not impenetrable. Enough pressure on your screen protector can damage the protector and the screen underneath. Since it only protects your screen, the back and edges of your device can gather scratches or get damaged from a fall.
After some use, you may notice cracks and breaks on your screen guard; you can remove it and replace it with another. Do this carefully to avoid bubbles in your screen protector. If you don’t know how, ask a professional to lend you a hand.
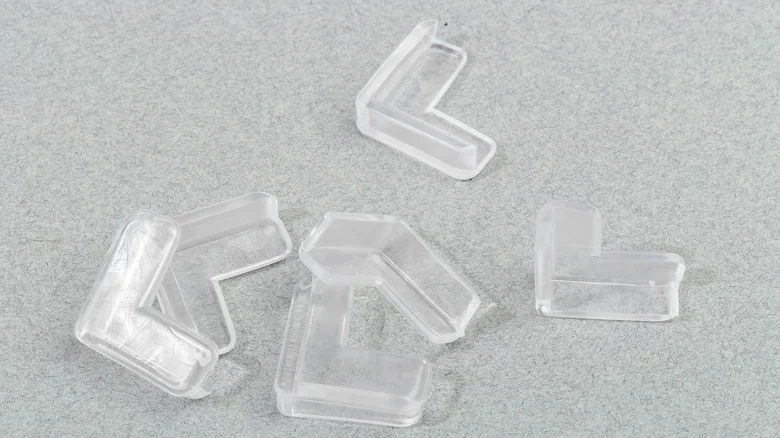
2. Smartphone corner protectors
Corner protectors are pieces of rubber or plastic that fit on the edges of your smartphone and can absorb the impact of a fall and distribute it evenly, reducing the risk of cracks or shattering. This means that if your phone falls on the face or back, there’s no need to worry. The corner protectors create a buffer between your device and the ground, preventing direct contact and potential damage.
The key difference between a phone case and a corner protector is that while the former covers your phone’s entire back surface area, corner protectors leave this spot free so you can still show off your smartphone brand to your friends. Corner protectors also keep your device light, and you don’t need to deal with extra weight from owning a phone case. For instance, you can get the Luxury Corner Edge Pad Lens Protector that doubles as a corner protector and specifically guards your camera lens.
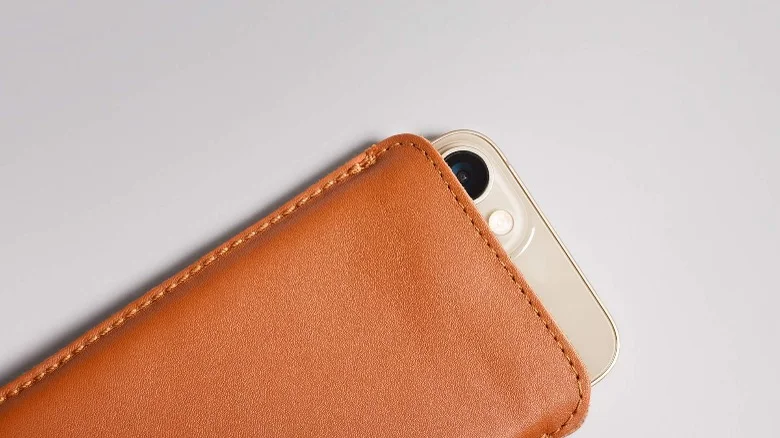
3. Smartphone sleeve
Try a smartphone sleeve if you want protection that envelopes your entire device. A sleeve completely covers your phone and protects it against scratches and even water, depending on the material it’s made of. The sleeve’s design slightly differs from phone cases, screen protectors, and corner protectors that only cover parts, not the entire device. Although a sleeve may mean extra protection, you can’t use your phone while it’s in one. So you’ll have to take it out whenever you want to read or send messages.
Sleeves are great for those who like using their phones without any add-ons, but this means your device is at risk till you place it back in. As mentioned earlier, sleeves can be made from leather or silicone with stylish designs like the BIAJIYA Phone Card Holder available on Amazon. They are also great for traveling and can be worn on your belt or kept in a bag or purse.
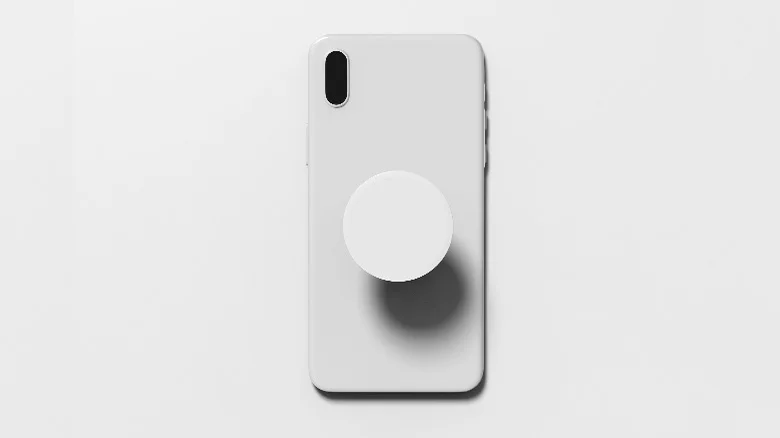
4. Smartphone grip
Grips take a different protection angle when compared with a phone case. Instead of wrapping your phone in a layer of protection, grips offer something different – a better way to hold your phone. Some types of grips also double as a makeshift stand. However, it’s fair to point out that if your phone falls, grips don’t offer much in the way of cushioning the blow.
There are different types of grips. For instance, the Casely Clear Phone Ring is pretty practical and perfectly fits around your fingers while maintaining a secure hold on your device. If ring holders aren’t your style, you can get a PopSocket Phone Grip from Amazon that’s compatible with MagSafe for wireless charging. Pop sockets can extend when needed and pop right back in place after, maintaining the slim look you get on your phone when you dump a bulky phone case.
While grips might not shield your phone from a fall’s impact, having one significantly reduces the chances of dropping your phone in the first place. Besides, they’re super handy for propping up your phone, making them perfect for video chats or binge-watching your favorite shows. So, while they’re a bit of a trade-off, the added grip and convenience might just be worth it.
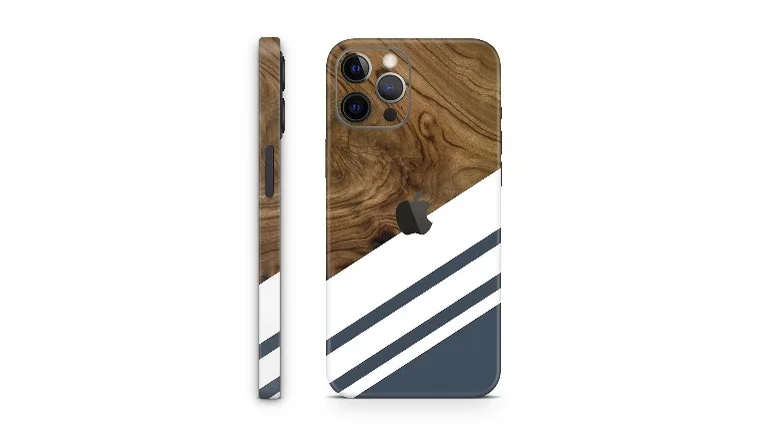
5. Smartphone skins/wraps
From a distance, a smartphone skin or wrap might easily be mistaken for the slimmest of phone cases. However, while both form a protective shield around your device, the similarities end there. A skin is a thin, light protective film placed on your phone, perfect for preventing scratches. Available in various designs, colors, and patterns, skins let you personalize your device’s look without the extra weight typically associated with phone cases.
Many smartphone skins are designed with textures that improve your grip on the device, reducing the likelihood of accidental drops. Materials like carbon fiber or textured vinyl used to make skins add to the visual appeal and provide a tactile surface that feels secure and comfortable in your hand. This subtle enhancement can significantly affect day-to-day use, especially for larger phones that can be slippery and harder to hold.
Skins are also pretty easy to install, and you can get it done yourself by following the instructions the manufacturers give alongside the product. For instance, you can install the White Skin Sticker on your iPhone in just four simple steps, and it leaves no glue marks behind if you decide to take it off.
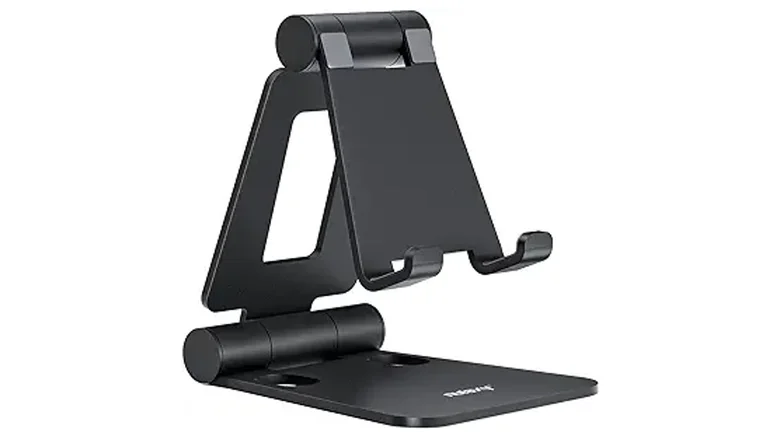
6. Phone stands
Stands provide an excellent barrier against accidental spills and place your device out of the reach of small children or pets. Compared with a phone case, stands only serve as protection for stationary use, but owning one has additional perks. Their design supports hands-free use and reduces the risk of your device getting knocked down or sliding off surfaces.
There’s a stand for every need. For those on the move, car phone holders securely anchor your device to the dashboard so you can navigate with your GPS without compromising safety. For the aesthetically inclined, wireless charging stands elevate your device for better visibility and help maintain a clean and organized workspace by eliminating messy charging cables.
You can also get the Nulaxy Dual Folding Cell Phone Stand and place your phone in landscape mode, perfect for video calls, watching movies, or just as an extra screen for your setup. iPhone users, in particular, will appreciate how iOS 17’s standby mode is tailor-made to complement the use of a phone stand, enhancing functionality and convenience.
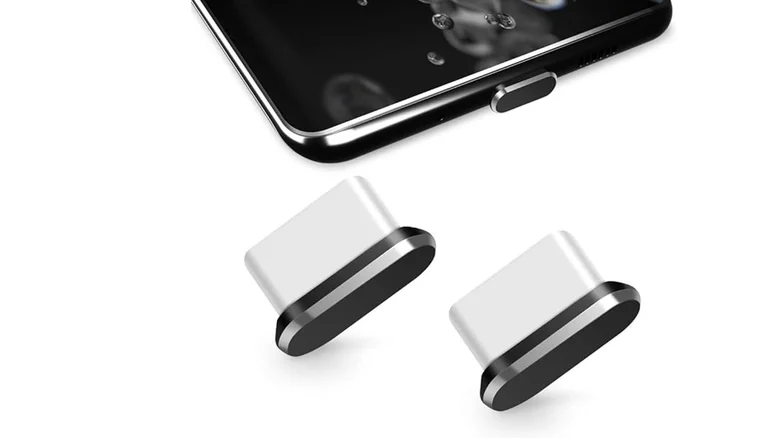
7. Dust covers
Dust covers, also known as port covers, are tiny plugs that cover up the open ports on your device, which most phone cases don’t protect. For example, the speakers, charging, and audio jack ports are pretty much exposed when not in use, and it’s easy for dust and grime to gather over time. If there’s enough build-up, it can even lead to charging issues, among other problems.
Dust covers are relatively cheap compared with eccentric phone cases. You can get a Cobee Type C Dust Plug for just $4.79 on Amazon, or you can try out this USB C Dust Plug that also comes with speaker covers to prevent dust and water from getting into your phone.
Dust covers also preserve the slim look of your phone, protecting your device while staying perfectly hidden away from sight. You only need to remove your dust cover when you want to charge your device or plug in headphones. If you use wireless headphones and charge your device wirelessly, there’ll probably be no need to remove your dust cover, making it a somewhat permanent feature on your smartphone.
8. Wallet cases
Some smartphone users already place their cards between their phones and phone cases, but this isn’t advisable since it may generate heat. If you’re looking for some storage space and protection, a wallet case is a perfect utility piece for you. On one hand, the design and material used to create the wallet case give you a better grip on your device. On the other hand, it also lets you store your ID and Credit cards safely.
The Pelican Magnetic Wallet & Card Holder is a particularly great add-on to your device as its MagSafe design means your wallet case lies firmly on the back of your phone. While you may be worried that a wallet would add the extra bulk you’re trying to avoid that comes with a phone case. These cases usually have slim designs and, depending on what you decide to place in them, you probably won’t notice much difference in weight.
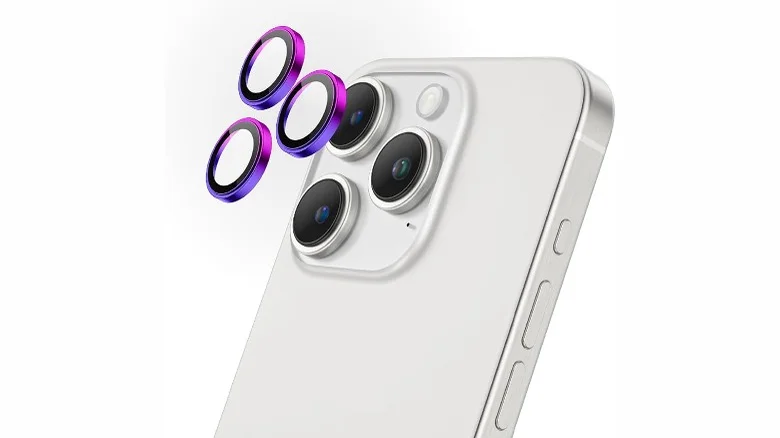
9. Camera lens protector
On many smartphones, the back camera protrudes from the flat surface of your device. This makes it easy to scratch or crack your camera lens if care isn’t taken. All of which can be devastating because visible breaks on your camera lens may affect the picture quality. Luckily, that’s where a camera lens protector steps in to keep your cameras safe.
While your phone case might not protect your phone’s camera lenses, camera lens protectors exist for that one specific purpose. Usually made with tempered glass or plastic, a lens protector shields your camera lens from scratches and cracks in case of a fall. They also prevent dust from gathering on your lens, and if you notice any breaks on it, you can replace it, just like you would a screen protector. If you use an iPhone with multiple cameras, you can get the Ferilinso Camera Lens Protector to keep all your lenses safe.
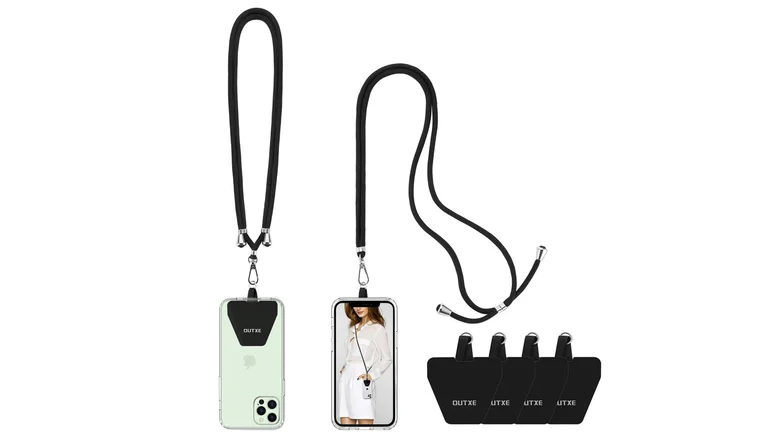
10. Phone lanyard
There’s always a chance your device may fall even when you’re using it, and that’s where a lanyard comes in. This strap or chord is attached to your phone, and depending on the length, it can be worn across your wrist or neck. With a phone lanyard, you can quickly access your phone without digging into your pockets. This makes it a handy tool if you’re wearing an outfit without any pockets or you’re at an event where you’ll need your phone camera from time to time.
Most importantly, a lanyard offers a secondary layer of security in case your phone slips out of your hands. If you accidentally drop your phone while wearing a lanyard, it won’t fall to the ground but lie on your chest — and it makes it harder to steal your device since it’s always attached to you, assuming you never remove it from your neck or arm.
A smartphone lanyard is also a great security feature for the forgetful or absentminded, so long as they leave the lanyard attached to their person. If you own multiple smartphones, you can get the OUTXE Phone Lanyard, as it’s compatible with all devices.
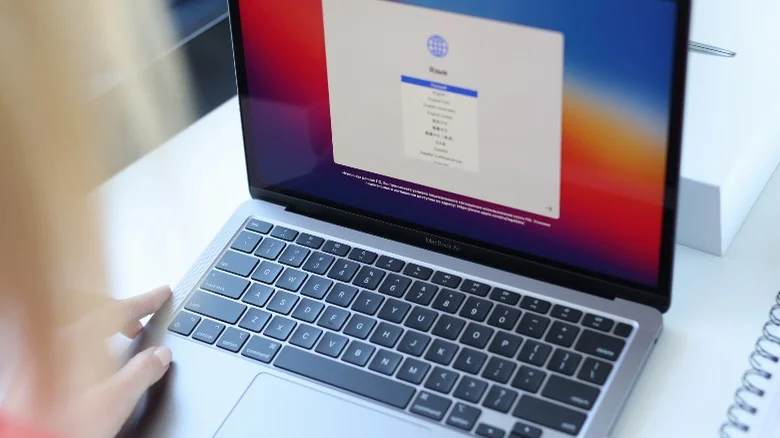
4 Reasons You Should Switch From Windows To A MacBook : Whether you are on the search for a laptop to use for your school assignments or a device that you can use daily to browse the web, MacBooks are undeniably among the greatest machines you’ll find in the market. In the last few years, macOS has seen significant upgrades. If you’ve been using Windows for a decade and think it’s time for a switch, but are afraid of taking the plunge, it’s normal to wonder whether the upgrade is worth it.
One thing is for certain, switching from Windows to a MacBook is a steep learning curve. It’ll initially take you a bit of time to familiarize yourself with the ins and outs of the macOS operating system, like the switch from control to command. You will eventually get used to macOS and find it relatively easier to navigate once that does happen. Here are four reasons why you should take the bold step of ditching your Windows laptop for a MacBook, and one reason why you should stick to Windows.
You may resell your laptop later
Many of us seek a durable laptop with good resale potential. MacBooks stand out for maintaining their value on the used market better than most other tech brands. Despite their initial high cost, MacBooks are renowned for longevity and timeless design. Proper maintenance ensures they retain their sleek appearance over time.
Opting for an older MacBook with an Intel chip may not be wise as Apple will likely cease support in the near future. This would significantly diminish its resale value. However, with the introduction of the M1 chip in November 2020, newer MacBooks offer better prospects for resale, making them a more favorable investment.
You’re already deep into the Apple ecosystem
The Apple ecosystem encompasses a range of devices, from iPhones and iPads to Apple TV, AirPods, Apple Watch, and the Mac lineup. These devices run on different operating systems – macOS, iPadOS, and iOS – which share common functionalities. Although each device can function independently, they are designed to seamlessly integrate and work together. While competitors like Microsoft and Samsung have attempted similar integration, they have not achieved the same level of success.
Considering investing in a MacBook? It’s advisable if you already own an iPhone or iPad. Having one of these devices enhances your experience, enabling features like Continuity Camera, which lets you use your iPhone or iPad as a webcam for your Mac, and AirDrop for easy file transfers.
A standout feature of the Apple ecosystem is its continuity across devices. With the same Apple ID and features like Handoff enabled, you can start a task on one device and seamlessly continue on another. Additionally, with Wi-Fi and Bluetooth activated, you can copy content on one Apple device and paste it on another, enhancing productivity and saving time in the process. While seemingly minor, these features significantly improve efficiency and streamline workflow.
You’re looking to work on the go
If you find yourself dashing across your college campus or enjoy working in cafes, opting for a sleek and lightweight device is the way to go. Luckily, MacBooks, whether Air or Pro, rank among the lightest laptops available. For instance, the 13-inch MacBook M2 Air weighs just 2.7 pounds, making it effortless to slip into your backpack and kickstart your day.
When selecting a laptop, battery life is a crucial consideration. Regrettably, Windows laptops often fall short in this department. Conversely, MacBooks boast impressive battery longevity, often enduring an entire day’s worth of work without fretting over battery levels. A key factor contributing to the exceptional battery life of newer MacBooks is the utilization of Apple Silicon chips.
Apple Silicon, being a custom-designed chipset, allows Apple to optimize efficiency far beyond what is achievable with Intel or AMD chips commonly found in PCs. Apple asserts that the M3 MacBook Pro can sustain up to 22 hours of video playback and 15 hours of wireless web browsing. Similarly, the M2 Air touts 18 hours of video playback and 15 hours of wireless web surfing. Thanks to the M-series chipsets, it’s safe to assume you can leave your power adapter behind when working on the move.
You want a laptop that’ll last
Technology progresses swiftly, with Apple consistently unveiling newer devices on an annual basis. Even if you opt to sell your MacBook before purchasing a replacement, recovering the entirety of your initial investment is improbable. Typically, users find themselves considering an upgrade four to five years post-purchase. Despite their higher price point, MacBooks are renowned for their robustness.
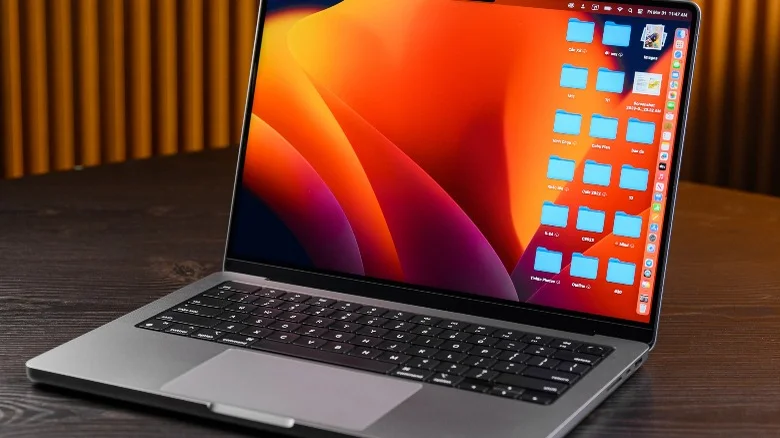
Unless subjected to rough handling, such as being casually tossed into a bag without protection and frequently dropped, MacBooks are highly resistant to cosmetic damage due to their aluminum construction. Additionally, the longevity of macOS support further prolongs the need for upgrades. Presently, macOS Sonoma extends support to MacBook Air and Pro models from 2018 onward.
In essence, this implies that the earliest supported MacBooks are those from 2018, though they won’t receive subsequent macOS updates. Consequently, users can anticipate receiving approximately six years of software updates, which is generally favorable.
If you’re on a budget, stick to Windows
Whether you choose a MacBook Air or a Pro, whether it’s refurbished from Apple’s website, brand new, or pre-owned, one consistent factor prevails: Apple products typically reside at the higher end of the price spectrum. While adjusting to this reality is possible, not everyone has the financial flexibility to accommodate such expenses readily available. For instance, the 13-inch MacBook M2 Air starts at $1,099, the 15-inch version at $1,299, and the 13-inch M1 Air at $990. It’s crucial to note that these prices reflect the most basic configuration, featuring 8 GB of RAM and 256 GB of internal storage.
Likewise, the entry-level model of the 14-inch M2 Pro, equipped with 8 GB of RAM and 512 GB of internal storage, retails for $1,599. Meanwhile, the base configuration of the 16-inch M2 Pro, boasting 16 GB of RAM and 512 GB of internal storage, commands a price tag of $2,499. While the actual price may vary depending on your desired specifications, it’s disheartening that the base configurations of MacBooks often fail to align with their price points. Unfortunately, both RAM and internal storage are non-upgradable post-purchase.
While external SSDs provide a workaround for storage expansion, increasing RAM is not an option beyond choosing a different configuration at the time of purchase. Additionally, Apple has yet to incorporate touchscreen functionality into MacBooks. Therefore, if you seek a device compatible with a stylus, opting for a 2-in-1 convertible laptop or an iPad with a Magic Keyboard might be a more suitable choice. Ultimately, determining whether the premium price of a MacBook is justified depends on your individual needs and priorities as a consumer.
Major Motherboard Brands Ranked Worst To Best : When procuring components for a PC assembly or enhancement, the motherboard is frequently disregarded. Although the GPU, CPU, and even an SSD can wield considerable influence over performance, the humble motherboard still holds significance. It serves as the linchpin, determining whether future upgrades will be straightforward or necessitate a more extensive overhaul, and can optimize the utilization of pricier, more glamorous components.
While your primary concern understandably revolves around your board’s compatibility with existing or planned components, there are additional factors to ponder. The manufacturer of the board carries weighty importance. While there may be some overlap among certain brands, each manufacturer offers distinct hardware, potentially constraining your options if you require something highly specific, such as a laptop board.
In the mid-range and high-end market segments, you have several alternatives, with other manufacturers presenting more basic boards at appealing price points. Reputation, alongside the availability of customer service, should also factor into your decision. It’s worth noting that the landscape has evolved since 2022; some well-established brands may not uphold their former standards, while smaller manufacturers have succeeded in establishing respectable reputations. Below, we outline our ranking of 10 major motherboard manufacturers, arranged in descending order based on our assessment.
10. Intel
Intel is one of the biggest names in computer hardware, though if you ask most people what the company makes, they’ll only be able to say processors. Slightly more knowledgeable people may also say something about RAM or Wi-Fi cards, but very few will say motherboards. Around a decade ago, Intel decided to wind down its motherboard manufacturing operations. The company instead prefers to supply chipsets to other manufacturers, such as ASUS, MSI, et al.
Despite this, Intel does still manufacture some boards, though they’re unlikely to be the kind any home PC builder will use. Instead, these are bare-bones pieces of kit designed for older systems. In light of that, unless you’re overly enthusiastic about using a Pentium Processor and a couple of sticks of DDR2 RAM in your build, we wouldn’t recommend one of Intel’s in-house boards.
While the boards are an absolutely terrible choice for anyone building a modern rig, they do still serve a purpose. Older hardware is still in use all around the world, serving its purpose adequately, and maintaining it with parts like these is cheaper and easier than upgrading it to something modern. Intel ranks last on our list because, while its chipsets are the basis for some of the best boards around, it only produces a limited amount of pretty obsolete tech in-house.
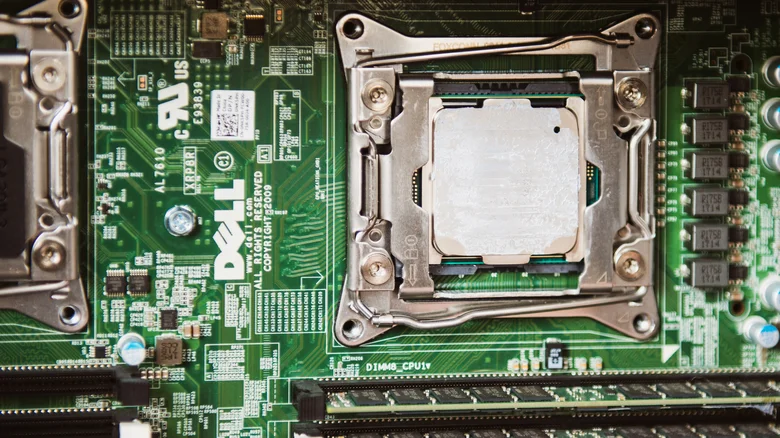
9. Dell
While you may not think of Dell as a motherboard manufacturer, the tech company does make several of its own boards — though not for the reasons you might think. You could, probably, use one to build a PC, though you may have to get comfortable with soldering and heavily modifying your case. Either way, it’s a bad idea and not what Dell’s boards are meant for at all. There are also older Dell boards still on the market if you’re determined to get one in a PC, though support was likely withdrawn for them years ago, so you’re probably on your own if something goes wrong.
The boards Dell still manufactures and sells are designed for its laptops, and most of them are shaped to fit into a particular model. They’re intended to be replacements people can use to replace the boards in their laptops should they become damaged. They are also priced as you may expect specialist parts to be, as in they’re very expensive for what you actually get. Dell can do this as you don’t really have many other choices: it’s either pay what the company’s asking, try to salvage a second-hand part from a used laptop, or just abandon the idea of repairing your machine altogether.
Dell also used to make full-sized motherboards but abandoned the practice several years ago. You may still be able to find an old one online, but you’d be buying a fairly obsolete piece of technology. Dell places ninth on our list because the boards it offers are relatively modern, but are only useful to a small niche of people.
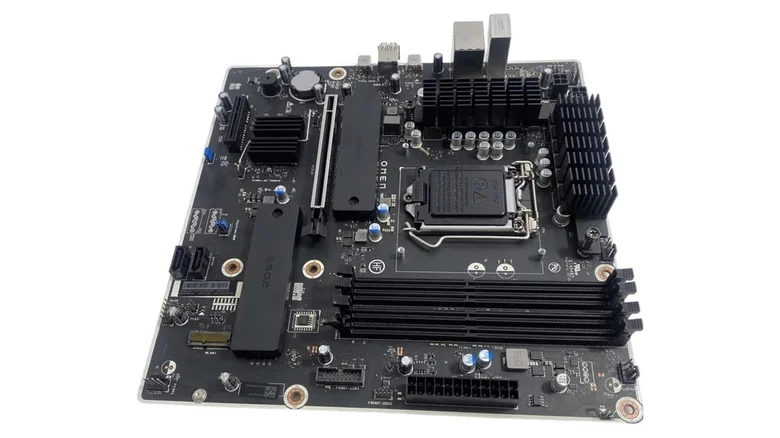
8. HP
As far as computers go, HP is better known for its laptops and pre-built desktops. It does sometimes make its own motherboards for those desktops, though, and said motherboards can be found on Amazon. They’re usually refurbished and designed for an older Intel chipset, so we can only imagine they are meant for people who want to spend around $150 to keep their old desktop alive rather than someone wanting to build a new rig. While HP’s boards had some moderately decent components a few years ago, you shouldn’t expect anything fancy from the Californian company these days.
Still, if for whatever reason you really want an HP motherboard, you can use one as the basis for a custom-built PC. You’ll just need to make sure parts like the processor and RAM are compatible with your board choice, and your rig will likely be fairly obsolete compared to something you could build on a different manufacturer’s board for a similar price. Replacement motherboards for HP’s range of laptops are also available to buy, and despite the relatively high prices, this may be a better option than scrapping a broken laptop. Beyond this, it would be silly to consider purchasing one of HP’s boards. The manufacturer ranks eighth in our list because, while the HP boards on the market appear to be salvage jobs, there is still more variety present than what the manufacturers in the ninth and 10th slots offer.
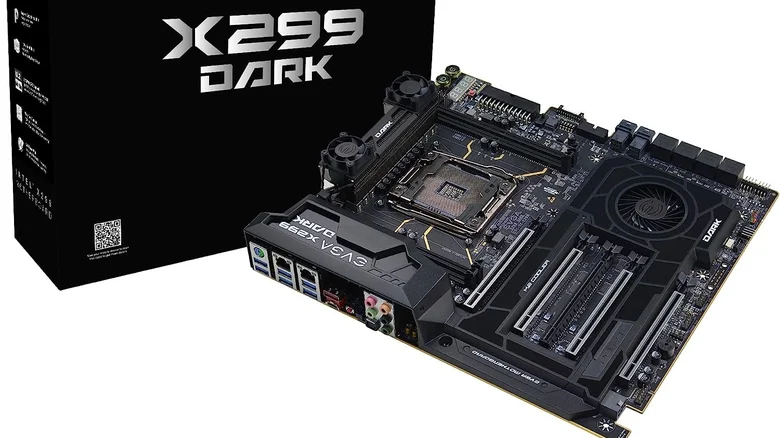
7. EVGA
As of July 2023, it turns out that EVGA may stop manufacturing motherboards, just as it recently stopped manufacturing GPUs. That would be a real shame, as the Taiwanese company’s hardware has historically been very decent. If the company folds entirely or doesn’t maintain stockpiles of parts, then warranties could be a worry when purchasing an EVGA board. If you do decide to take the risk and nab what may soon be a Bonafide collector’s item, then you might not be disappointed. With that said, at the time of writing, supplies of EVGA boards seem to be limited at several major online retailers.
This could be a hangover from events like the coronavirus pandemic and global chip shortage that saw supplies dwindle and prices skyrocket, or it could be a further indication that all is not well in the EVGA camp. EVGA tends to offer the same range of products as every other high-end manufacturer. You’ll find plenty of cheap, basic options alongside extreme high-end offerings and everything in between.
Recent reviews on sites like NewEgg include some indication that quality control is becoming an issue with EVGA’s boards, and customer service may not be on point — though other major manufacturers have similar reviews attached to their products, so a fair pinch of salt must be taken when reading them. EVGA is fairly low on our list but would have ranked nearer the top just a few years ago. There’s always a chance the company will turn things around and get back to its glory days, but you should probably give it some thought and a lot of research before pulling the trigger on one in 2023. The uncertainty has left EVGA seventh on our list.
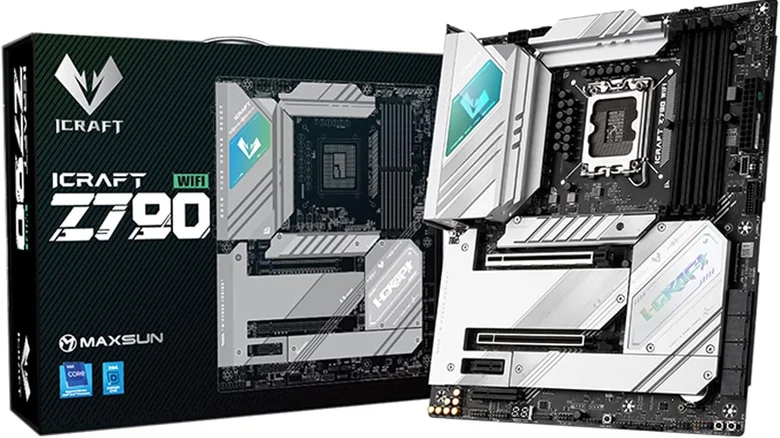
6. MAXSUN
MAXSUN is a brand of motherboards you probably haven’t heard of unless you’ve spent a lot of time building PCs in China. Still, the company’s products are available outside of its homeland and can be significantly cheaper than equivalent boards from better-known manufacturers. In terms of quality, the fact it is made in China shouldn’t be seen as a negative. Most of the hardware better-known brands use is also made there.
The boards themselves look very similar to other modern offerings, so expect plenty of beefy heatsinks covering the board itself. Like many of the cheaper brands, it doesn’t appear to be offering anything based on AMD’s AM5 chipset at the time of writing — though this is likely to change as time goes on. Most of their output tends to be built around the last generation’s chipsets, and the average price for a MAXSUN motherboard is under $200, which is where many believe all motherboards should still be priced.
If you’re rocking an Intel CPU, then MAXSUN does have offerings based on the Z790 chipset, like the MAXSUN iCraft Z790 WiFi Gaming Motherboard. You can then put the money you save on this toward hardware that can actually take advantage of a PCIe 5 port (like a very expensive SSD). While MAXSUN is an emerging brand in the West and its motherboards will likely meet its customers’ needs, it’s still not established enough to force its way above some of the bigger names on the motherboard scene. It sits in sixth place, but that could change in the future.
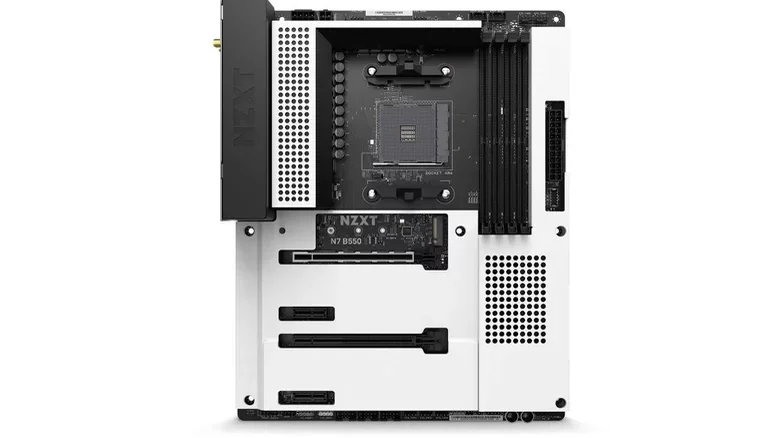
5. NZXT
NZXT may be better known for its cases, fans, and power supplies, but the PC parts company also produces a line of motherboards for both Intel and AMD processor-based systems. In terms of price, NZXT’s motherboard offerings are firmly in the mid-range, hovering somewhere between $200 and $300. It is worth noting that at the time of writing the company has yet to release a board that uses AMD’s X670 chipset, so you’re out of luck if you have a 7000 series AMD processor and want a PCIe 5 port. It does, however, offer a Z790 board for Intel users, and AMD boards in general are a recent addition to the brand.
The main selling point of NZXT’s boards seems to be their styling, which matches the manufacturer’s cases and other parts. This includes boards with white heatsinks, which should please gamers going for an all-white build. Beyond the styling, there doesn’t seem to be anything that makes NZXT’s boards stand out, and as mentioned, the company is better known for the other parts it produces.
That’s not to say the boards are unreliable or bad in any way, but you may want to spend your money elsewhere if you’re building a gaming rig and don’t care too much about the color scheme matching. NZXT is a well-established brand with a reasonable selection of motherboards on offer. If you do encounter problems, there’s a good chance you can have them resolved in a reasonable manner, hence its place in the middle of our pack.
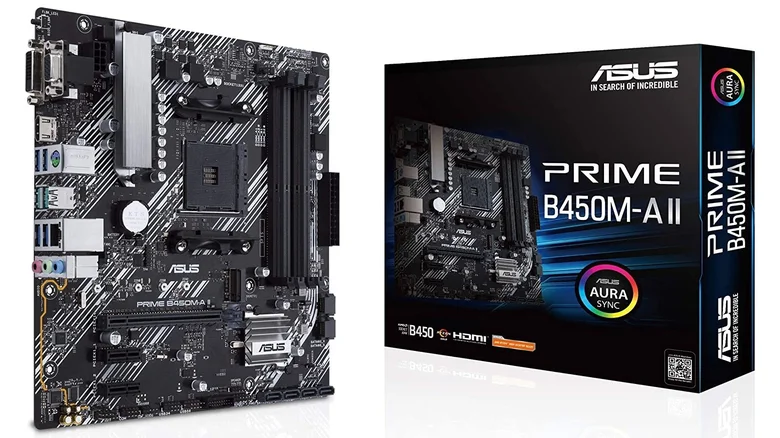
4. ASUS
If we’d written this at the start of 2023, there’s every chance ASUS would be on top of the list. Over the years, the company had built up a reputation for delivering high-quality hardware aimed at gamers and enthusiasts. Boards sold under its Republic of Gamers (ROG) label (like the ASUS ROG Strix Z790-E) were particularly good choices if you were looking to get the most out of your rig, and options spanned from cheaper boards in the $100 to $200 range to Crosshair boards, which can cost over $1,000 if you’re aiming for one on the latest AMD chipset. These boards are, for the most part, overkill for most gamers but a solid choice if you’re looking for a platform you can upgrade for years, absolutely have to cram all of the latest tech into your rig, or take overclocking to extremes.
Unfortunately, the high-end motherboard manufacturer managed to destroy all it had built in a few short weeks. There were well-publicized issues some motherboards, including ones made by ASUS, had with AMD’s Ryzen 7000 series processors. A firmware issue led to some boards overloading the processors, which led to a fire in several cases, destroying both the board and processor. The issue itself has hopefully been resolved thanks to a firmware update that puts a firm cap on the voltage the processor can draw, but that’s not the only issue. ASUS reportedly gave many customers a hard time when it came to support, replacements, and the coverage its warranty provides. This too was rolled back and the warranty was clarified — but it may take many people a long time to forgive and forget in this case. ASUS places fourth in our rankings.
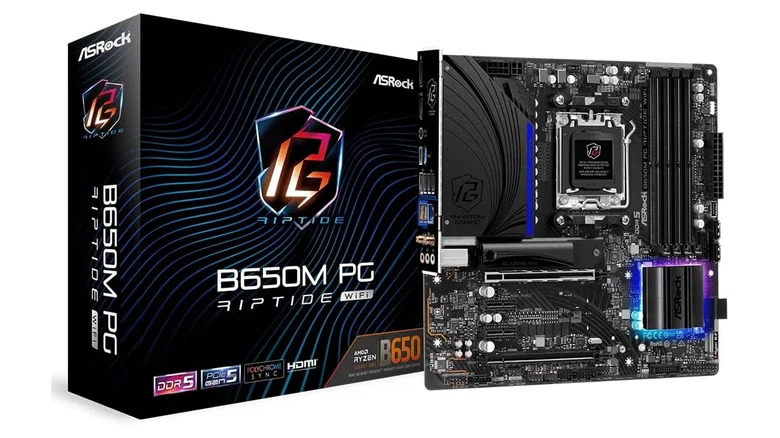
3. AS Rock
AS Rock isn’t a high-end parts supplier by any means; it’s quite the opposite. The company has built its reputation by making cheap, no-frills boards that just work — like the ASRock B650M PG Riptide WiFi you see above.
Overselling motherboards seems to be a common thing in the modern PC parts market — but if you sit down and think about what you actually need, then a basic motherboard is likely ideal for your build. We’re a few years away from PCIe Gen 5 becoming relevant to M.2 storage, and GPUs aren’t even capable of taking PCIe Gen 4 to its limits. You also don’t need 18 power stages unless you’re heavily into overclocking. The money you’d spend on a board with these high-end features could instead be put toward parts that will actually make a difference in performance, like a better processor or GPU.
Reliability isn’t easy to gauge, as companies tend to keep data on failure rates private, but theoretically the more basic the board, the less there is to go wrong. So again, AS Rock may be onto something with the niche it’s carved out. If we’re going off Amazon reviews alone, customers seem to be very happy with the budget board maker. In short, don’t let the fact it’s not a big name put you off. If you’re not going for an ultra-high-end build with enthusiast-level parts, AS Rock is a very good choice of motherboard manufacturer. It places third, behind two companies offering a wide range of options and doing so very well.
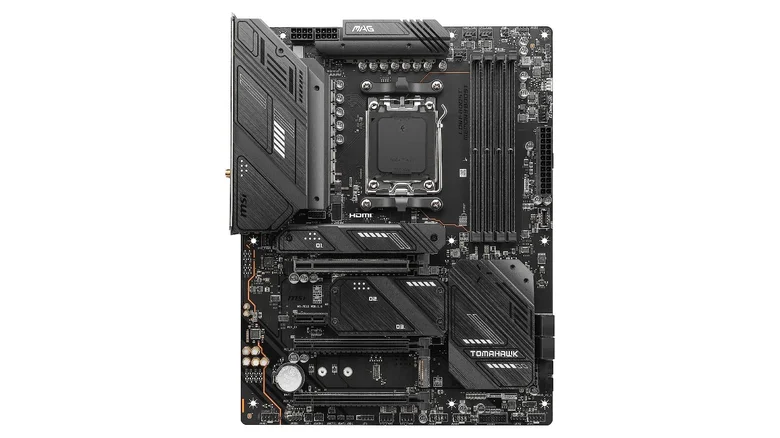
2. MSI
MSI used to have a bit of a hit-and-miss reputation, but the company’s hardware has improved drastically over the last few years. Its motherboards also have the coolest names of any mainstream manufacturer and tend to share their tags with weapons. If you want to say your PC is built on a “Mortar” or a “Tomahawk,” then you should probably base your build around an MSI board like the MSI MAG Z790 – or the AMD version with the MSI MAG B550 Tomahawk MAX
Where MSI’s products really stand out is in the customization and control department. Tools like MSI Center, Mystic Light, and Afterburner make controlling things like RGB lighting and fan speeds a doddle. The BIOS is also fairly easy to navigate should you wish to do something a little bit more complex. In terms of offerings, MSI has boards ranging from basic to enthusiast.
While it offers equivalent boards to other major manufacturers like Gigabyte and ASUS, MSI’s boards can sometimes be found slightly cheaper than its rivals — which is a massive bonus. This is excluding the MEG, which falls into the same crazy “$1,200 board that no one actually needs” category as the Gigabyte AORUS Xtreme and ASUS Maximus. But to be honest, if you’re spending more than the MSRP of an NVIDIA GeForce 4080 on a motherboard, you need more help than this article can provide. While we’ve put MSI second, it may be the best option for your particular build, so do some heavy research before making your choice.
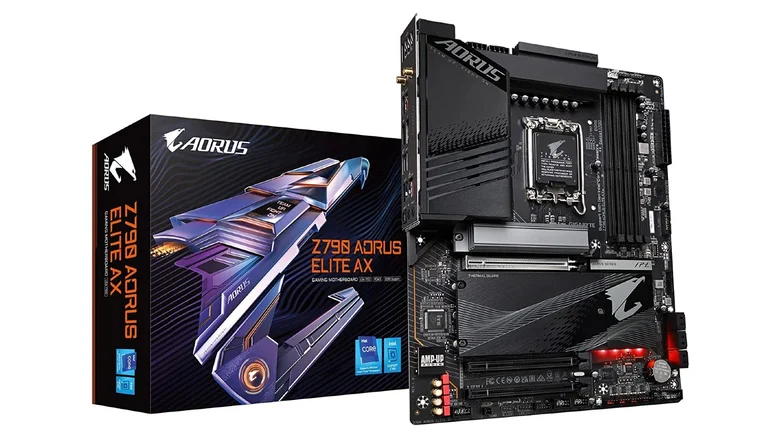
1. Gigabyte
Gigabyte is one of the bigger names when it comes to PC parts, and it is currently at the top of our list when it comes to motherboard manufacturers. If you browse Reddit, you’ll probably come across comments that question Gigabyte’s reliability and contain accusations relating to a decline in quality over the years. You’ll also see similar comments on every other major manufacturer’s pages. Complaints tend to get more press than compliments, and motherboards can sometimes shoulder the blame when a build has other issues or the person building the PC has messed something up in the BIOS. We’ll concede that Gigabyte isn’t perfect, but it is the best mainstream motherboard manufacturer as of 2023.
At the top of the pile when it comes to Gigabyte’s boards is the AORUS series, which offers a range of versatile components for enthusiasts and pro gamers with boards like the GIGABYTE Z790 AORUS Elite AX. AORUS boards feature robust power delivery systems, and tech in the BIOS that makes overclocking a lot easier. If you’re not a gamer, Gigabyte also offers the Aero series of boards which are designed to meet the needs of creators and streamers. Each label offers a range of boards, ranging from relatively cheap to over $1,000. There are also standard boards available for under $100 if you’re aiming for a budget build. There isn’t a lot between a Gigabyte board and any of the other established brands offering wide selections that include high-end products. However, its long legacy as a quality parts manufacturer and lack of recent controversies have secured it a place at the top of our list.